

OAuth is an open standard for authorization. It enables users to share resources without sharing their identity. You can permit access to one site for resources stored on another site.
The host Policy Server performs its authentication by first directing the user to the authorization server. User authentication is initially done by an OAuth authorization server, which issues an authorization token upon a successful authentication. The token is the means by which the Policy Server retrieves user information then authenticates the user based on these claims. Upon successful authentication, the user gets access to the target resource.
Users can sign-on with OAuth authentication servers, such as Google and Facebook. Users can authenticate themselves with OAuth credentials and access a protected resource.
If a user does not have a CA CloudMinder account, you can enable self-registration. The first time a user attempts to sign-on through an OAuth provider, the user is prompted to create a CA CloudMinder account. The user can then proceed with sign-on. On subsequent log-ins, the user signs on through the OAuth provider with no interruption.
These instructions provide the steps to configure OAuth authentication between CA CloudMinder as the Service Provider and Google or Facebook as the Identity Provider. These instructions also provide the steps to configure self-registration for Oauth authentication.
The following figure shows the configuration procedure. Before you begin OAuth configuration, we strongly recommend that you review this entire OAuth configuration process document.
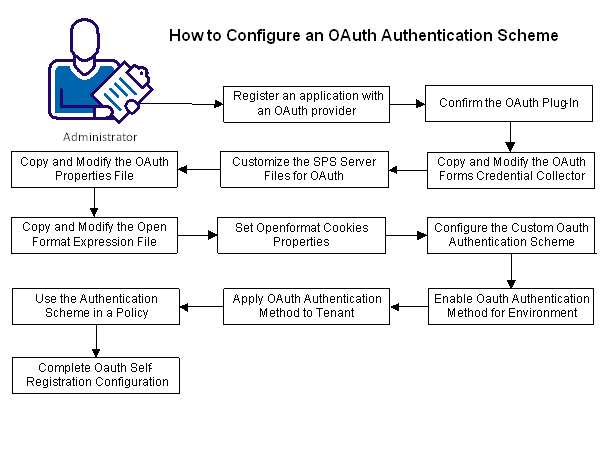
Complete the configuration tasks:
|
Copyright © 2013 CA.
All rights reserved.
|
|